How to add a webhook in KSeFGPT
Enter an HTTPS address, configure headers, run a controlled test and save the webhook for the selected company.
- Module
- Integrations
- Reading time
- 5 min
- Difficulty
- Easy
You could do this with your eyes closed :)
- Published
- August 28, 2026
- Author
- Rafał Zeidler
- Format
- Written guide and video
Written procedure
What you will do
You will add a Webhook integration to the selected company. It can pass messages from the Send Notification action to your own endpoint.
You will run a real browser POST test in the form. After saving, the Active card confirms only that the configuration was stored, so production behavior must also be checked in a controlled workflow and at the receiving endpoint.
Requirements
Before you start
Prepare a controlled HTTPS endpoint. It should accept a POST request and return a 2xx status. For the form test, it must also allow browser CORS requests, including OPTIONS and the headers you use.
Never show real tokens or secrets in screenshots, recordings or support requests.
| Item | Description |
|---|---|
| Access | The company owner or an organization member with the integrations:manage scope. |
| Plan | A plan with the Automation and Integrations features enabled, currently Trial, Pro or Enterprise. |
| Endpoint | A controlled HTTPS address that accepts POST. The form test requires a valid CORS configuration. |
| Headers | An optional JSON object in which every value is a string. |
| Starting point | After signing in, select Integrations in the Automation navigation group. |
| Time required | About 4 minutes. |
Process recording
PT19.36SThe recording shows Webhook selection, address and header configuration, a controlled test and saving the integration.
Open integrations
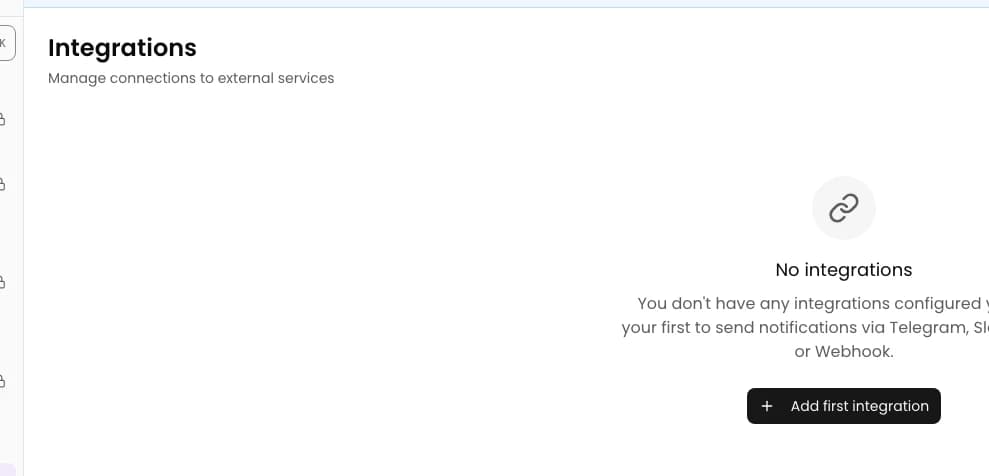
In the side navigation, select Integrations in the Automation group. Select Add first integration, or Add integration if the list already contains other connections.
A dialog with the available integration types will open.
Select Webhook
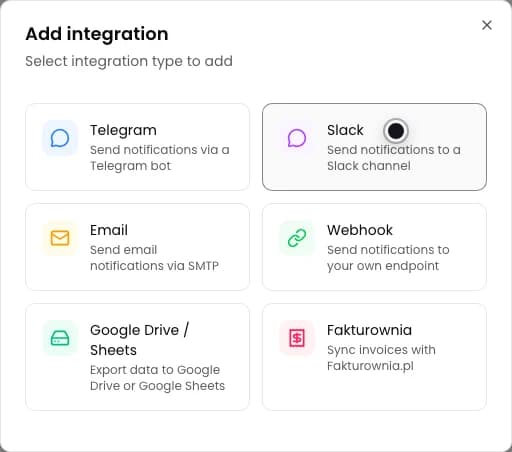
In the Add integration dialog, select Webhook. Its card describes a connection that sends notifications to your own endpoint.
The Configure Webhook form will appear.
Enter a name and HTTPS address
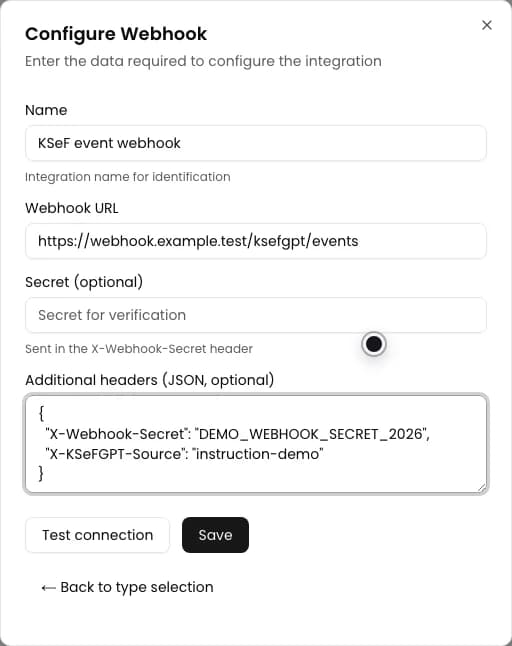
Enter a recognizable integration name in Name. In Webhook URL, enter the full address of your controlled endpoint, preferably beginning with https://.
The test form accepts HTTP and HTTPS addresses, but HTTPS protects data in transit. KSeFGPT stores the webhook URL without encryption, so do not put a secret in the address itself.
Add headers and test the connection
If the endpoint requires authentication, enter it in Additional headers as a JSON object, for example `{"X-Webhook-Secret":"test-value"}`. Every value must be a string. Headers are encrypted when saved.
The current separate Secret field adds X-Webhook-Secret only to the form test. The backend does not store this value, so do not use that field as the only security configuration. Add a secret needed by a workflow to the headers JSON.
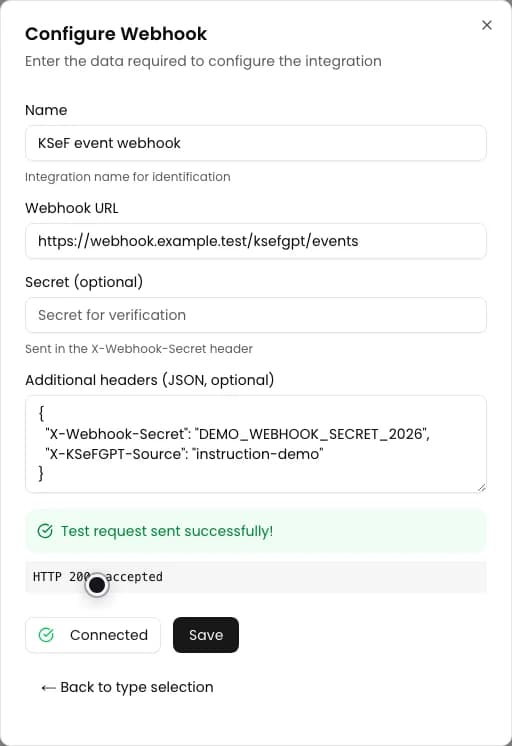
Select Test connection. The browser sends a POST with Content-Type application/json and a payload containing `test: true`, the message `Test połączenia z KSeFGPT` and the current timestamp. A 2xx status shows success. A CORS or network failure, or a response outside the 2xx range, shows a test error.
Save the integration
Select Save. The button is available after you enter a name and URL. Saving does not require a successful test first.
After the dialog closes, the new card should show the entered name, the Webhook type and the Active status. The status means that the configuration was saved. It does not confirm that the endpoint received a message.
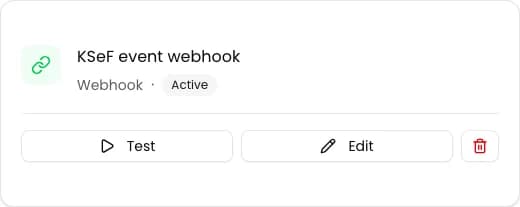
Final state
Check the result
Find the card with the entered name in Integrations. It should show the Webhook type and the Active status.
In the automation editor, select the integration in a Send Notification action, run a controlled workflow and inspect Execution history and the endpoint logs. Runtime sends the raw message text from the backend with POST and the stored headers. Browser CORS does not apply, and Content-Type is not added automatically.
The Test button on a saved card does not currently send a request. Runtime also does not mark an HTTP 4xx or 5xx response as a failure, so confirmation at the receiving endpoint is essential.
Diagnostics
If something does not work
Compare the symptom with the table below.
| Symptom | Likely cause | What to do |
|---|---|---|
| Test connection is disabled | Webhook URL is empty. | Enter the complete HTTP or HTTPS endpoint address. Use HTTPS in production. |
| Invalid URL format | The address is incomplete or uses a protocol other than HTTP or HTTPS. | Correct the address and include the protocol, host name and required path. |
| Invalid JSON headers format | The field is not a JSON object or its syntax is invalid. | Use an object such as `{"Header-Name":"value"}` and enter every value as a string. |
| The test ends with Failed to fetch or a CORS message | The endpoint does not allow the KSeFGPT origin, POST, OPTIONS or the entered headers. | Configure CORS at the endpoint or verify the connection with a controlled backend workflow. |
| The test shows HTTP 4xx or 5xx | The endpoint rejected the request or returned an error. | Review the first 200 response characters, authentication rules and endpoint logs. |
| The secret works in the test but not in a workflow | It was entered only in the separate Secret field, which the backend does not currently store. | Add X-Webhook-Secret to Additional headers and save the integration again. |
| The integration does not appear in the list | Saving failed or the integrations:manage scope is missing. | Check the save notification and ask the organization owner for the required permission. |
What next
Adapt the endpoint to the content sent by the selected workflow. The form test sends a JSON object, but Send Notification passes raw message text, so these are two different payloads.
After every header change, run a controlled workflow and inspect the receiver logs. Do not treat the Active status or the Test button on the card as delivery confirmation.
Add a webhook to KSeFGPT
Sign in, configure a controlled endpoint and save the integration for the selected company.
Sign in to KSeFGPT