How to issue an invoice from CRM?
Open a counterparty record, transfer the buyer details to an invoice and complete the sale details. After submission, check acceptance and the KSeF number.
- Module
- CRM / Counterparties
- Reading time
- 5 min
- Difficulty
- Intermediate
Follow the instructions carefully and you will succeed
- Published
- September 11, 2026
- Author
- Rafał Zeidler
- Format
- Written guide and video
Written procedure
What you will do
Start a standard VAT invoice directly from a counterparty record in CRM. The form will receive the buyer details from that record. Enter the number, dates, line items and payment terms, then submit the document to KSeF and check the result.
You do not need a sales opportunity. If you use one, issuing an invoice for a counterparty does not automatically link the document to a particular opportunity.
Requirements
Before you start
The example shows one service priced at PLN 1000 net, with 23% VAT and payment by bank transfer. Company names, identifiers and the invoice number are demonstration data. Enter your own sale details and the applicable tax rate.
| Item | Requirement |
|---|---|
| Access | Owner of the selected company, with access to CRM and Invoices under an active plan. This procedure was verified for the company owner. |
| KSeF | A configured KSeF connection for the company and permission to issue invoices on its behalf. |
| Required data | An existing counterparty record with correct buyer details; invoice number, dates, goods or services, prices, quantities, VAT rates and payment terms. |
| Starting point | After signing in, select the company that will be the seller and open CRM → Counterparties. |
| Time | About 5 minutes for one line item, plus KSeF processing time. |
| Effect | Submit to KSeF starts sending the document. Once KSeF accepts the invoice, its contents cannot be edited like a draft; errors require an appropriate correction. |
Process recording
0:57Go from a counterparty record to the invoice form, complete the sale details and check the submission result. The example uses demonstration data.
Open the counterparty record
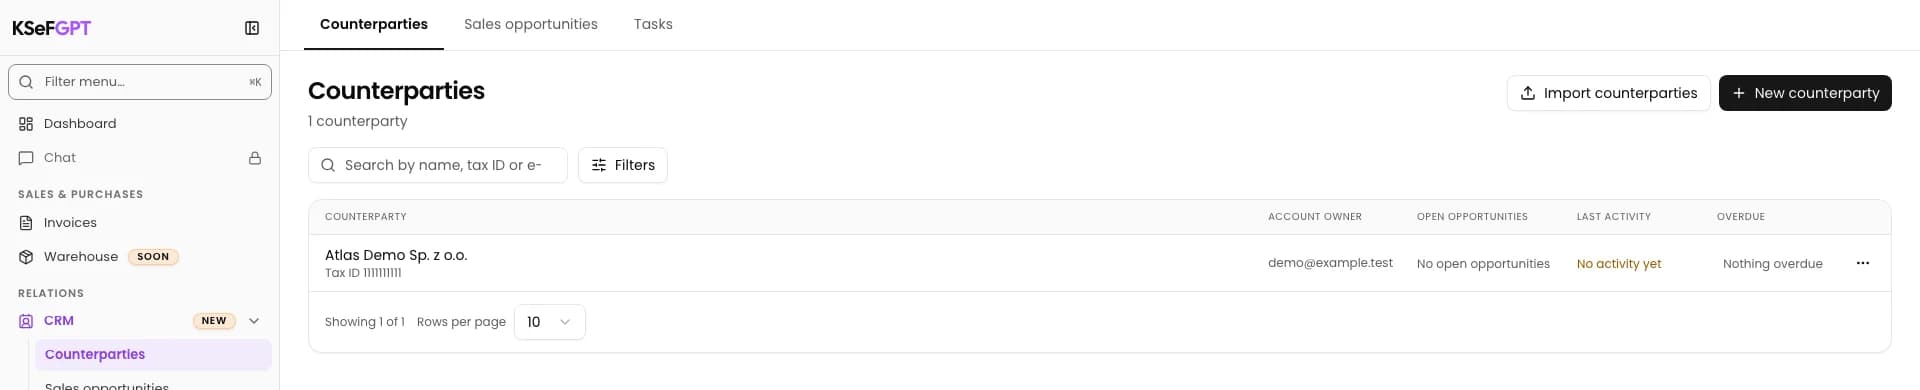
Choose CRM → Counterparties in the menu. Find the customer and click their name. This example uses Atlas Demo Sp. z o.o.
In the record, check the name, NIP (Polish tax ID) and address. These are the details that will be transferred to the invoice.
Choose Issue an invoice
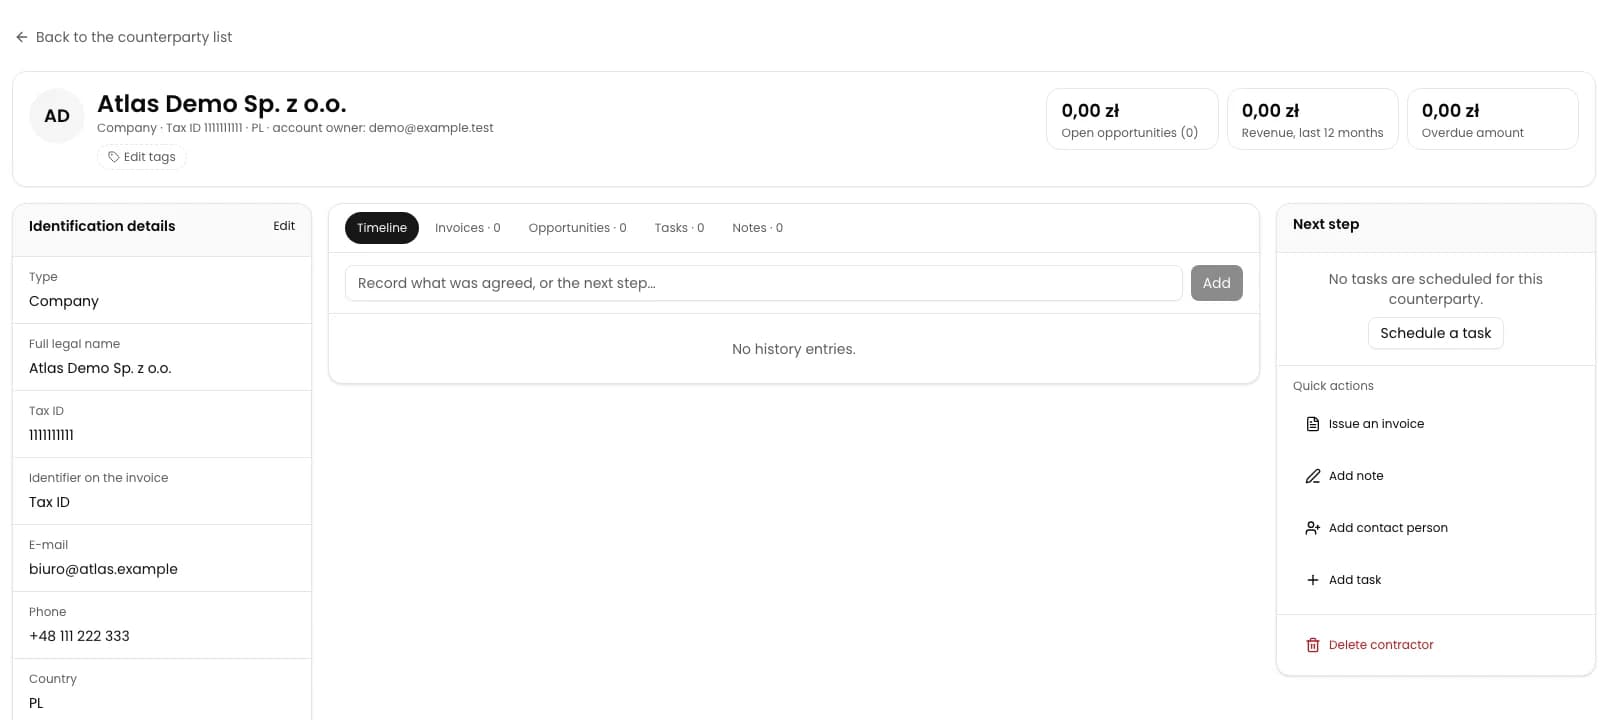
In the counterparty record, find Quick actions and click Issue an invoice.
The Invoices module opens on the Issue tab with an editable document. Seller details come from the selected company, and buyer details come from the CRM record you opened.
Check both parties and enter the invoice number
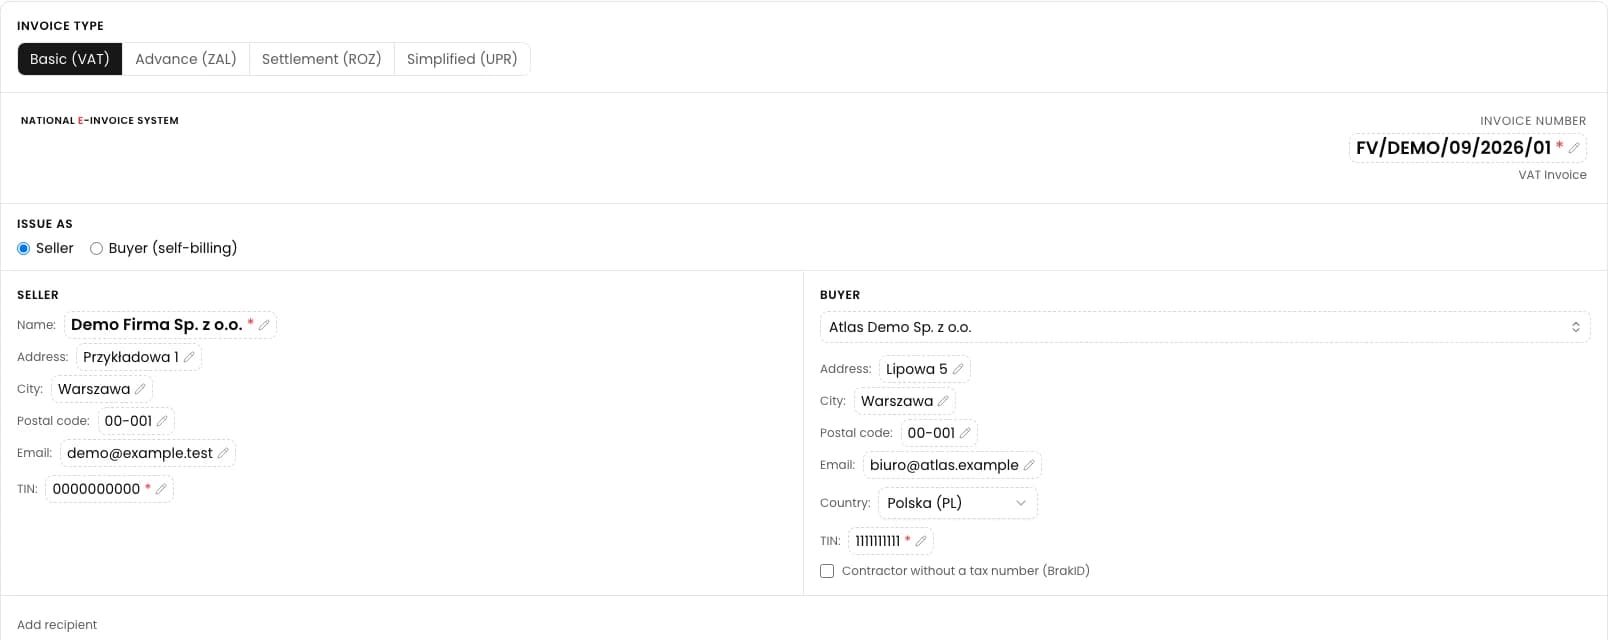
For a standard sales invoice, keep Basic (VAT) and Issue as → Seller. Check the seller’s name and NIP, and the buyer’s name, NIP, address and country against the transaction details. Complete any missing information.
Click Invoice Number in the document’s upper-right corner and enter a number that follows your company’s numbering scheme. This example uses FV/DEMO/09/2026/01. Click values inside dashed borders to edit them.
Set the document dates
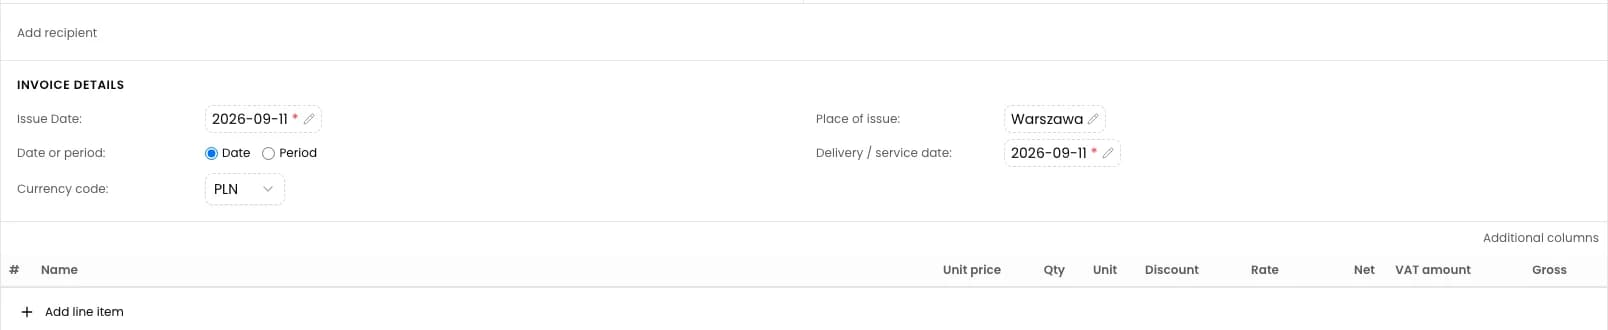
Under Invoice details, set Issue Date and Delivery / service date. For a single date, keep Date selected. This example uses September 11, 2026 in both fields.
Check Currency code. This guide uses PLN. The dates should reflect the actual sale and the issuing of the document.
Add a line item and check the amounts
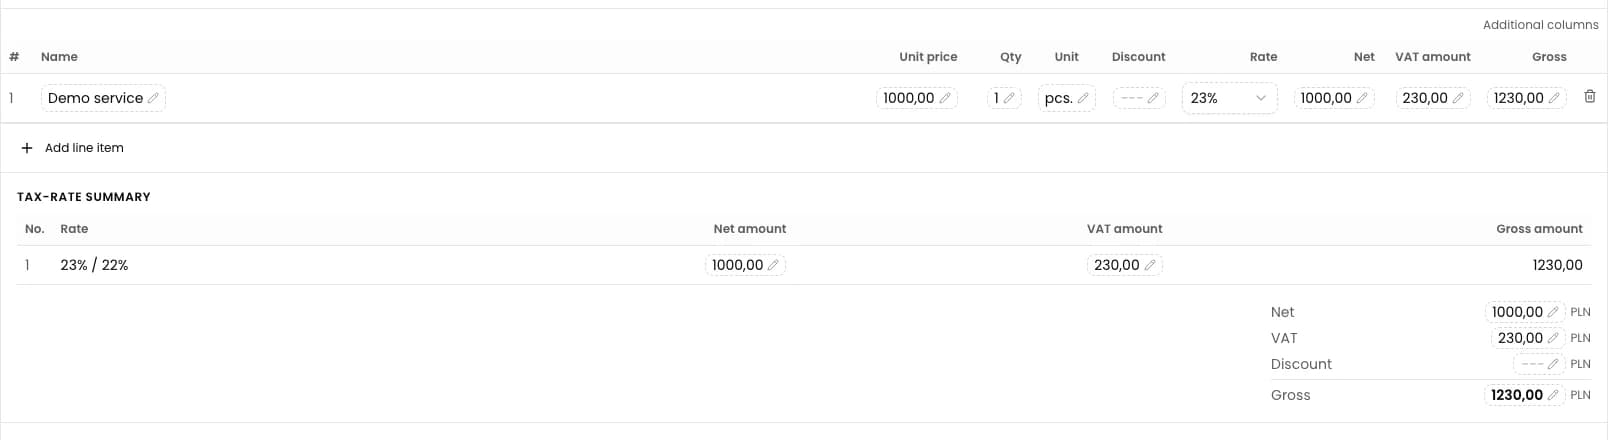
Click Add line item. Enter the product or service name, net price, quantity, unit and applicable VAT rate. Add a separate row for each additional product or service.
For this example, enter Demo service, net price 1000, quantity 1, unit pcs. and a rate of 23%. The totals should show PLN 1000 net, PLN 230 VAT and PLN 1230 gross. Verify these amounts before submitting.
Complete the payment details
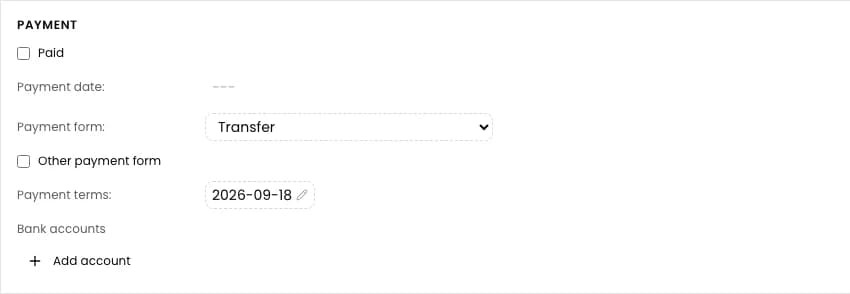
Under Payment, choose Payment form and set the due date. The example uses Transfer and September 18, 2026. If needed, choose Add account and enter the seller’s bank account.
Select Paid only if the amount has already been paid. In this example, the invoice is awaiting payment.
Review the data and submit to KSeF
Review the entire document: parties, number, dates, line items, amounts and payment details. If Fill in the required fields appears above the form, complete the listed data.
Select I take full responsibility for the correctness of data sent to KSeF, then click Submit to KSeF.
To return to the document later, choose Save as draft. Saving a draft does not submit the invoice or confirm its acceptance by KSeF.

Check the final result
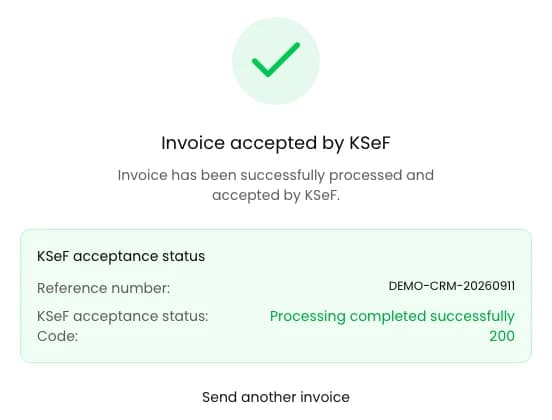
Wait for processing to finish. A successful result shows Invoice accepted by KSeF and the final code 200 under KSeF acceptance status.
The Reference number on this screen identifies the submission. To find the invoice’s KSeF number, open its details from the Outcome tab. Clicking Submit or seeing a processing status does not confirm acceptance.
Final state
Check the result
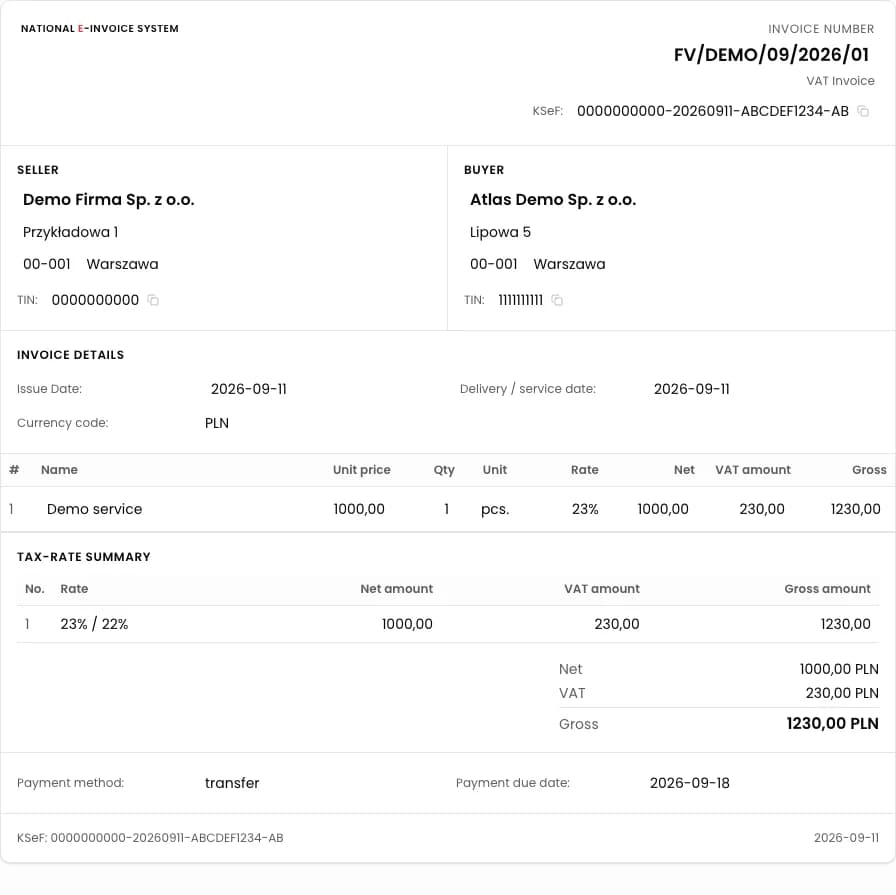
Open Outcome in the Invoices module. Find the submitted document by its invoice number, check the buyer and amount, then click the invoice number to open the details and check its KSeF number. In this example, the invoice is FV/DEMO/09/2026/01 for Atlas Demo Sp. z o.o., with a gross amount of PLN 1230. If the document is not visible yet, refresh the list and check again.
KSeF acceptance does not mean the invoice has been paid or automatically linked to a sales opportunity. Linking it to an opportunity is a separate action in CRM.
Diagnostics
If something does not work
| Symptom | Cause | What to do |
|---|---|---|
| Submit to KSeF is disabled and Fill in the required fields is displayed. | Required data is missing, such as the invoice number, dates or at least one line item. | Complete the fields listed above the document and check the totals. |
| The data is complete, but responsibility for its correctness has not been confirmed. | Submission requires the confirmation next to the button. | Review the document, then select I take full responsibility for the correctness of data sent to KSeF. |
| The buyer in the form is not the expected company. | Issue an invoice uses the details from the CRM record you opened. | Before submitting, compare the name and NIP. Return to the correct counterparty or change the buyer selected in the form. |
What next
Download the files using How to download an invoice as PDF, XML and UPO?.
To prepare a document for review first, see How to create an invoice draft before sending it to KSeF?.
Choose your next task in the CRM instructions.
Issue an invoice for your counterparty
Open the customer’s CRM record and use their saved details when issuing an invoice.
Open CRM counterparties