How to issue and submit a standard VAT invoice in KSeFGPT
Complete a standard VAT invoice, check the parties, line items and amounts, then submit the document to KSeF. The company needs an active KSeF connection and permission to submit invoices.
- Module
- Invoices
- Reading time
- 6 min
- Difficulty
- Intermediate
Follow the instructions carefully and you will succeed
- Published
- August 20, 2026
- Author
- Rafał Zeidler
- Format
- Written guide and video
Written procedure
What you will do
You will prepare a standard VAT invoice with seller and buyer details, at least one line item and a correct net, VAT and gross summary. You will then accept responsibility for the data and submit the document to KSeF.
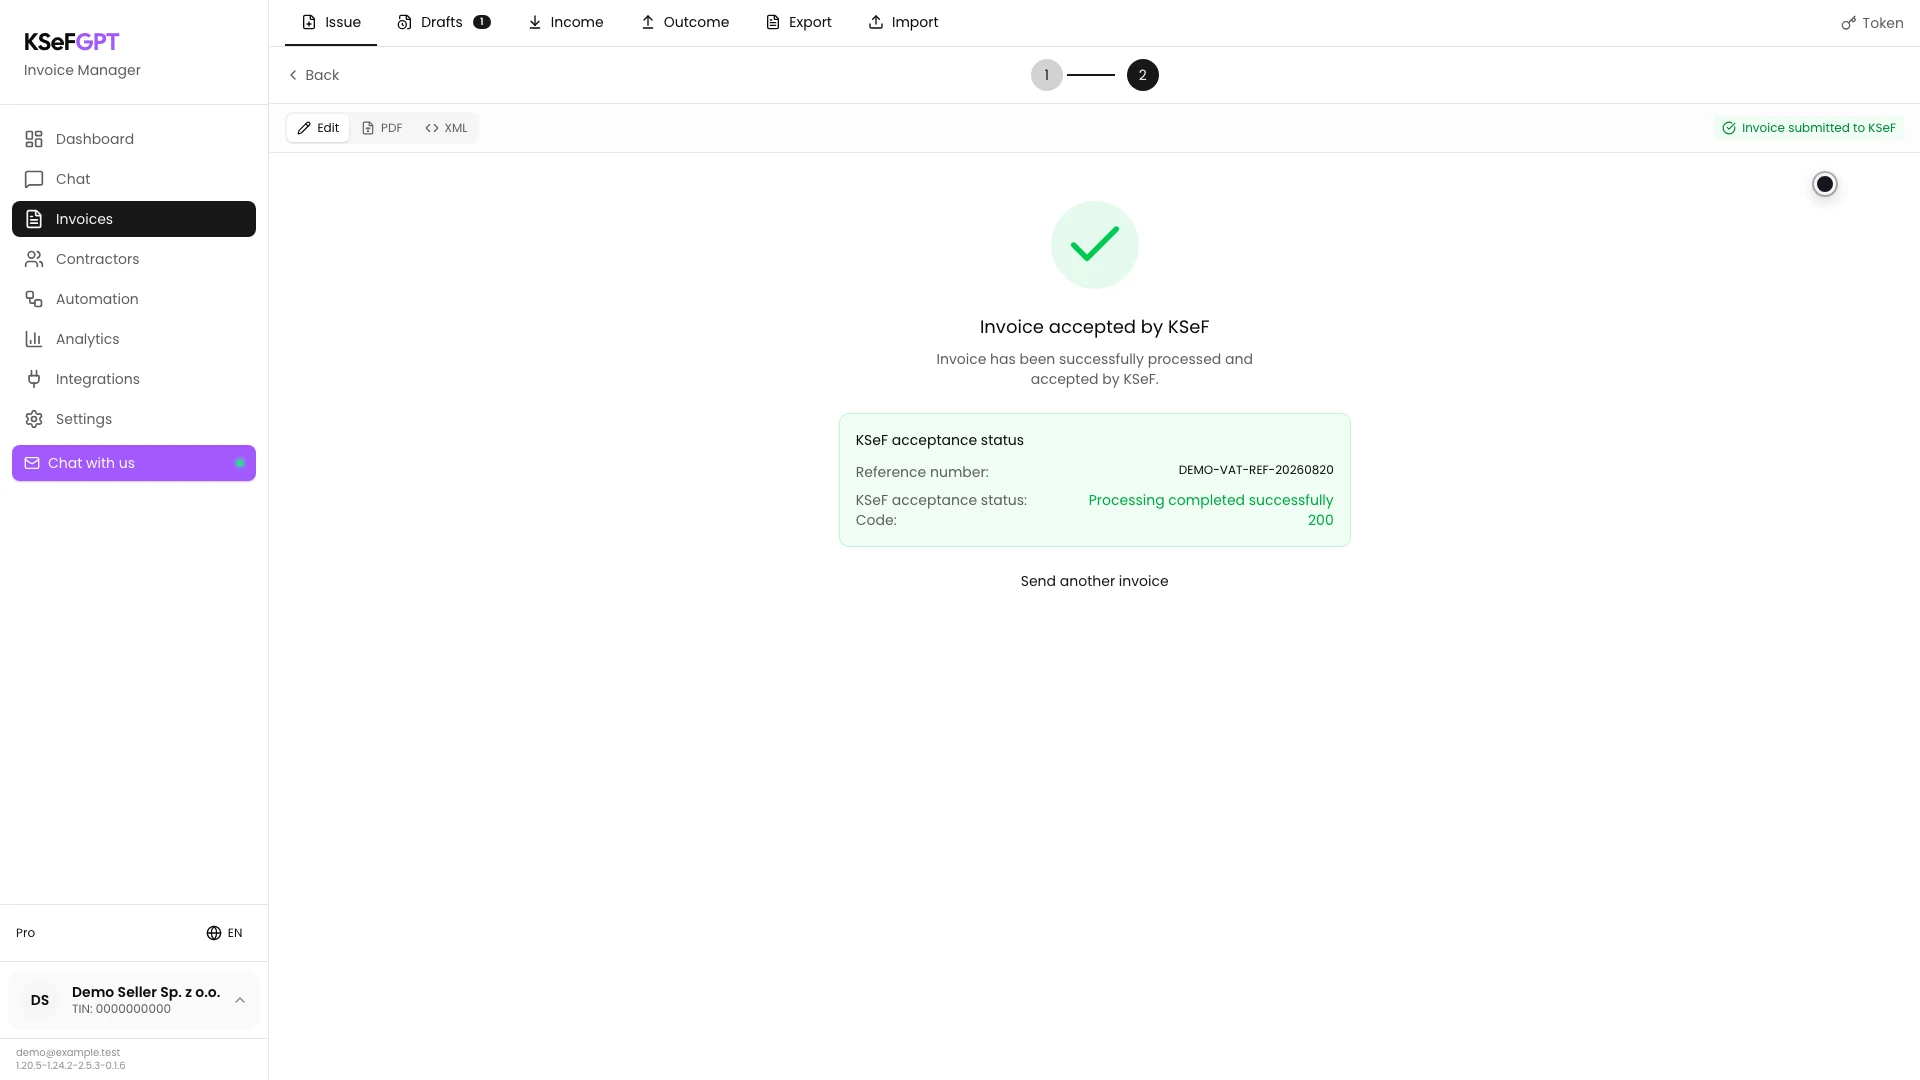
The process is complete only when Invoice accepted by KSeF and the KSeF number appear. A message that submission has started is not yet confirmation that the document was accepted.
Requirements
Before you start
Prepare all details before opening the form. Once KSeF accepts an invoice, you cannot freely edit its contents. An error in an accepted document may require a correcting invoice.
| Item | Description |
|---|---|
| Access | The company owner or an organization member with access to Invoices and the invoices:read and invoices:send permissions. |
| KSeF connection | The selected company needs an active KSeF token or certificate and permission to issue invoices. |
| Party details | The seller and buyer name, NIP and address. Check that the active company is the correct seller. |
| Invoice details | The number, dates, place of issue, currency, line items, quantities, prices, VAT rates and payment terms. |
| Starting point | After signing in, select the correct company and open Invoices → Issue → Invoice. |
| Time required | About 5 minutes once the details are ready. |
Process recording
0:20The recording shows a standard VAT invoice review, submission through a controlled demo flow and the final acceptance status.
Open the standard VAT invoice form
Use the company selector to choose the seller for which you are issuing the document. Then open Invoices → Issue and select Invoice.
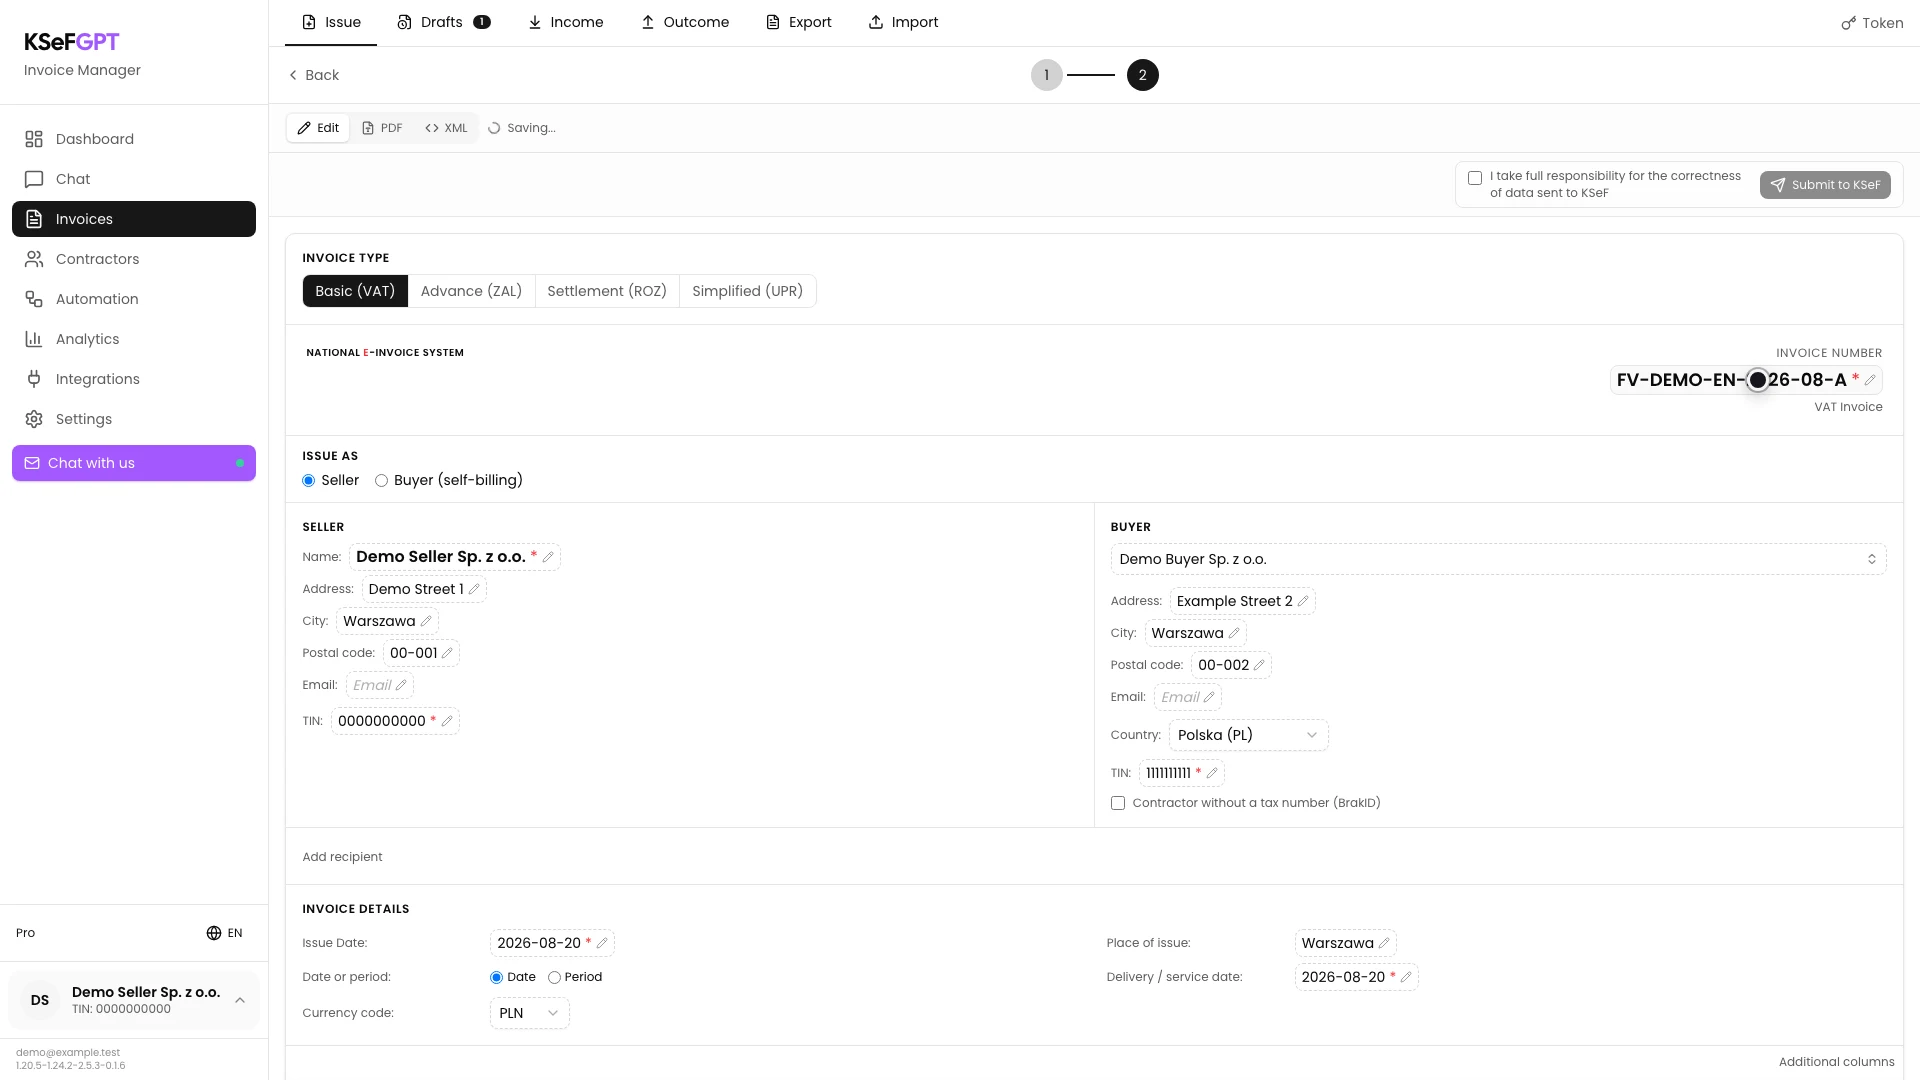
KSeFGPT opens an editable document in Edit and fills the seller details from the selected company. Leave Basic (VAT) selected under Invoice type.
Complete the number, parties and dates
Enter a unique invoice number and check the issue date, sale date or billing period, place of issue and currency.
Under Seller, check the selected company's name, NIP and address. Under Buyer, enter the recipient's name, NIP and address. The two entities should remain in their correct, separate sections.
Add line items and check the summary
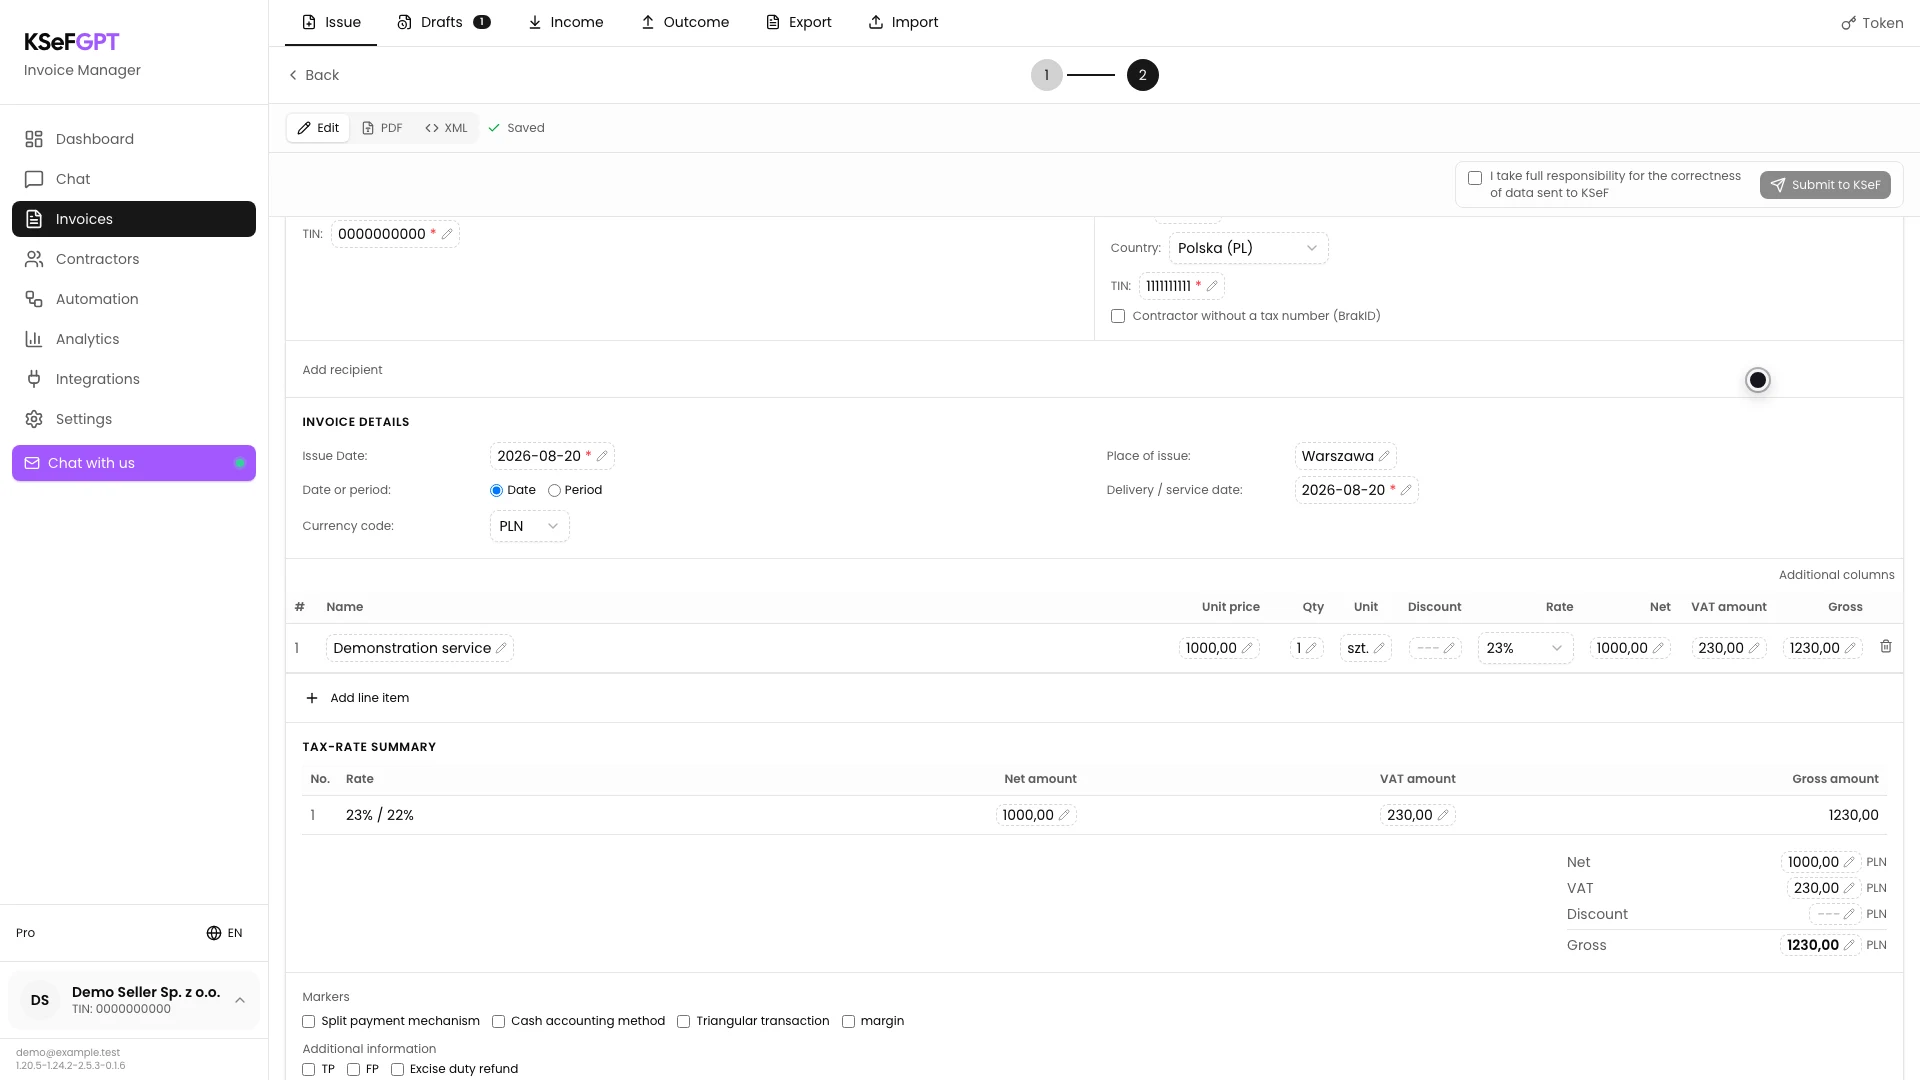
Add an invoice line and enter the goods or service name, net unit price, quantity, unit and correct VAT rate. Add more lines if needed.
Compare the calculated net, VAT and gross amounts with the source records. Complete the payment method and due date and any markers required for the transaction.
The bar above the document should not show missing fields or XML errors. Do not continue to submission until the line data and totals are correct.
Select the authorization method and confirm the data
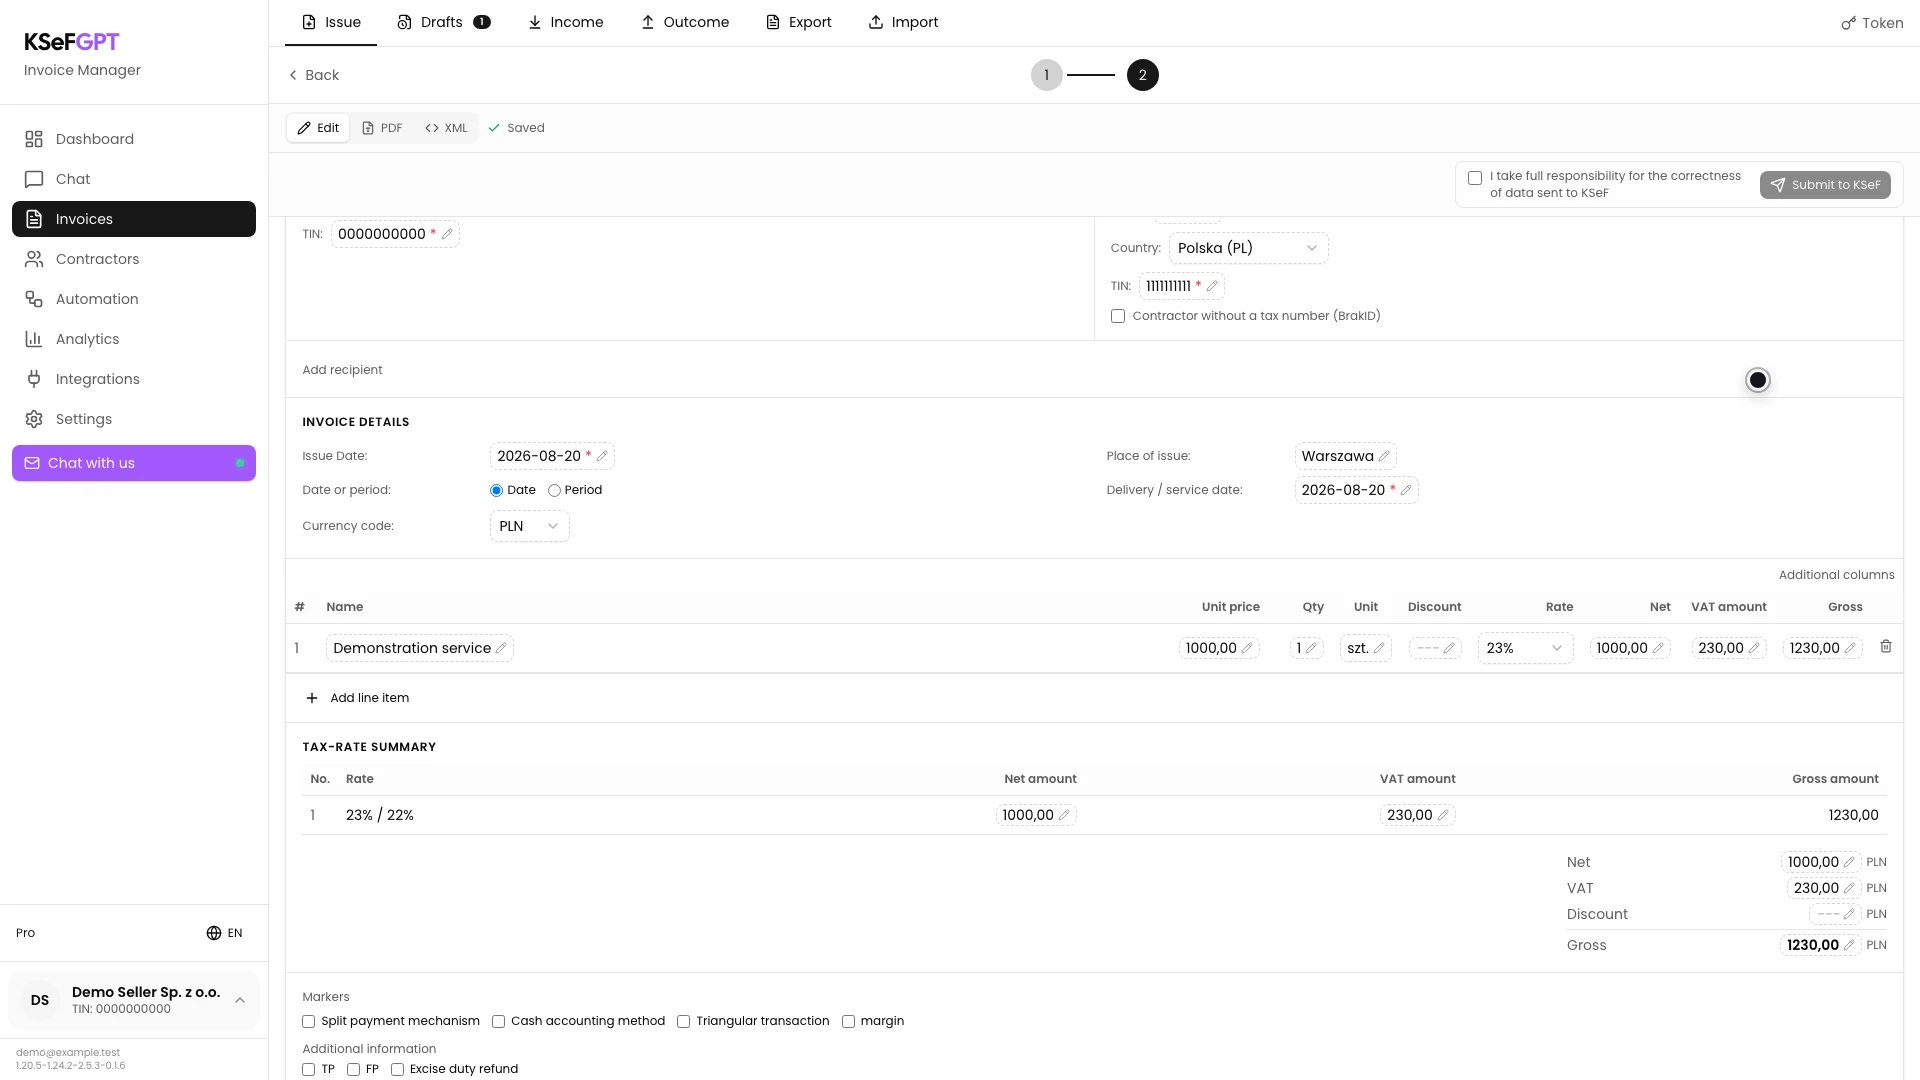
Check the authorization method shown for the selected company. If more than one connection is available, select the token or certificate whose permissions cover this invoice.
Review the document from top to bottom. Select I take full responsibility for the correctness of data sent to KSeF. Submit to KSeF should become active when the form and XML are valid.
Submit the invoice and wait for acceptance
Select Submit to KSeF. KSeFGPT generates the XML, sends the document using the chosen authorization method and checks the processing result.
Do not leave the process after the initial submission message. Wait for Invoice accepted by KSeF or Invoice rejected by KSeF with an error code and description.
Final state
Check the result
The operation succeeded when you see Invoice accepted by KSeF, code 200 and a KSeF number. Copy the number or open the invoice in Outcome and confirm that the document is available.
If processing is still shown, wait for another refresh. Do not issue the same invoice again only because the final status did not appear immediately.
Diagnostics
If something does not work
Compare the symptom with the table below.
| Symptom | Likely cause | What to do |
|---|---|---|
| The Invoice form is not available | The module or invoice issue feature is not available for your plan or role. | Check access to Invoices. An organization member needs at least invoices:read. |
| A KSeF connection warning appears | The selected company has no active token or certificate. | Configure the company's KSeF connection in Settings and return to the form. |
| Submit to KSeF is disabled | A required field, line item, valid XML or the responsibility confirmation is missing. | Complete the items shown in the validation bar, fix XML errors and select the confirmation. |
| The API refuses submission | The member lacks invoices:send or the KSeF method cannot issue the invoice. | Ask the owner for the correct scope and check the token or certificate permissions. |
| The final status is Invoice rejected by KSeF | KSeF rejected the data, XML structure or sender permissions. | Read the error code and description. Correct the indicated issue before submitting again. |
What next
Open the invoice in Outcome and download the files required for your document workflow. Follow How to download an invoice as PDF, XML and UPO in KSeFGPT.
If you find an error in an invoice accepted by KSeF, do not edit it like a draft. Identify the required correction and issue a correcting document.
Issue a standard VAT invoice in KSeFGPT
Sign in, select a company connected to KSeF and prepare the document for submission.
Sign in to KSeFGPT